First, a big welcome to new subscribers! I’m glad you’re here. And my heartfelt thanks to those who have taken advantage of the Anniversary deal to become paid subscribers at a discount. Your support is the fuel that keeps me writing.
Remember the Anniversary deal is continuing through the end of the month. If you’d like to support this work by becoming a paid annual subscriber at a 20% discount, just click the button below. Thank you!
The Baby Blanket Continues…
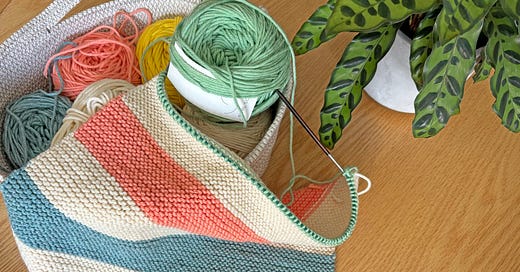
This is the third part of a continuing series about making what I hope will be the perfect baby blanket for an expectant coworker. You can read about my goals for this project here, and get details about the yarn I’ve chosen here.
Today I’m going to show you how I’m making this blanket with no cast-on or bound-off edges. These edges are usually the tightest, most inflexible part of knitted fabric. To avoid disrupting the wonderfully stretchy garter stitch, I’ve chosen to eliminate them.
Here’s the Plan
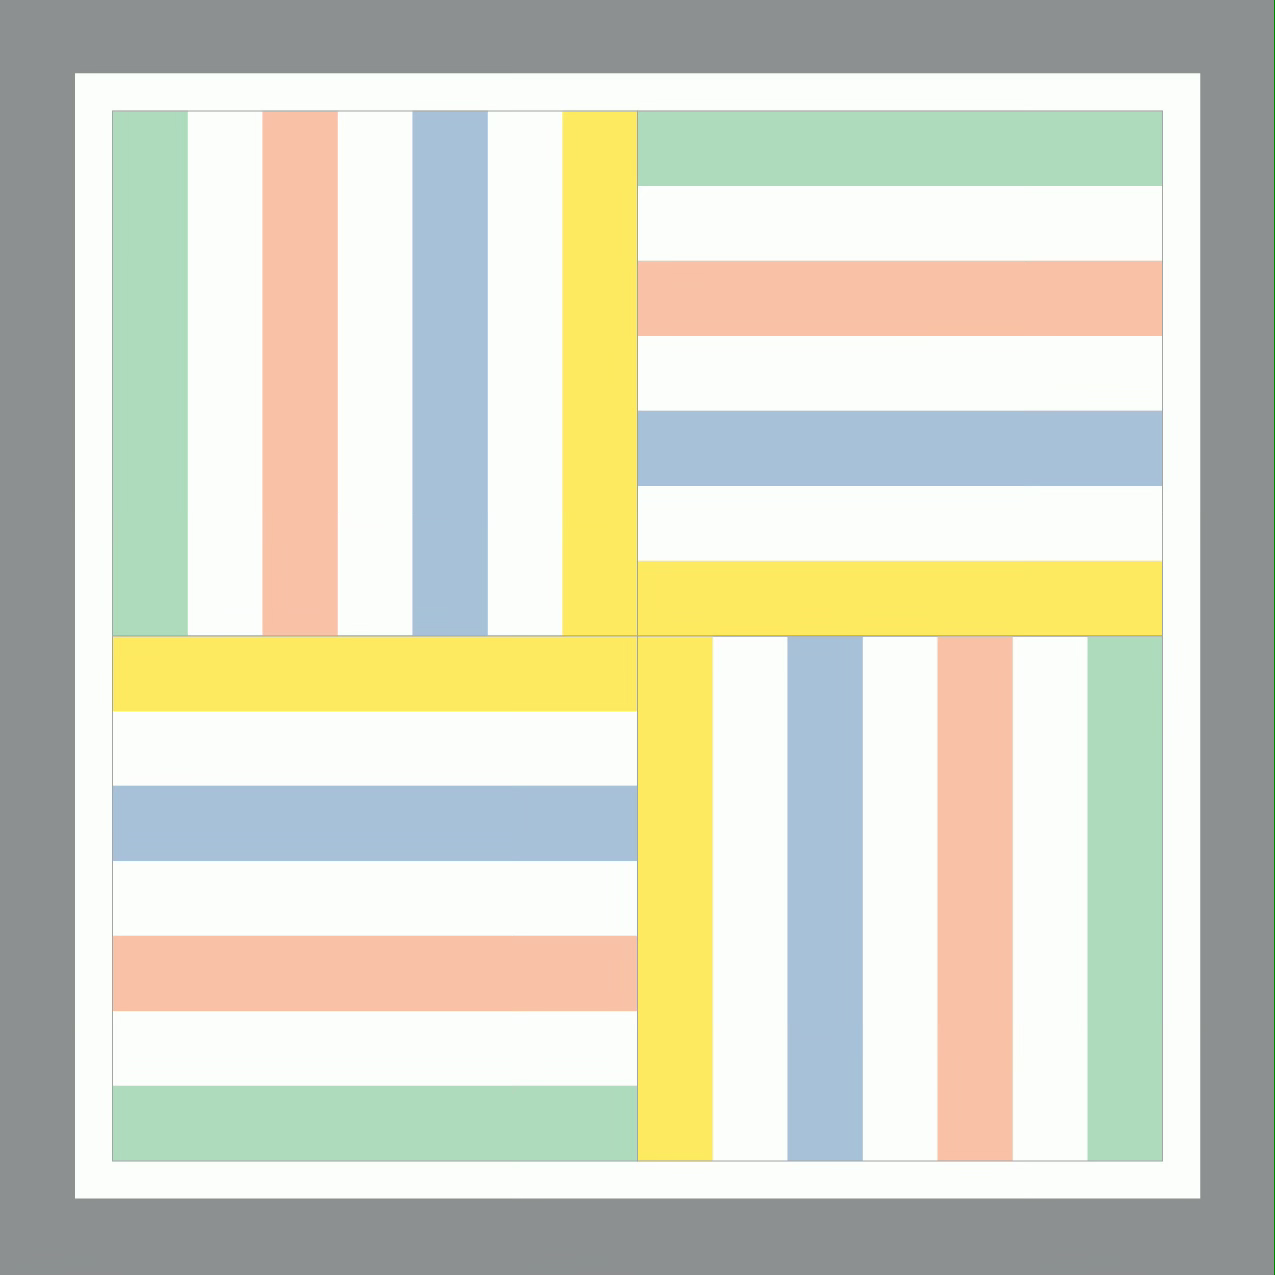
As a refresher, here is where we’re going: A square blanket composed of 4 identical striped squares plus a narrow border. Each of the squares has seven stripes of equal width.
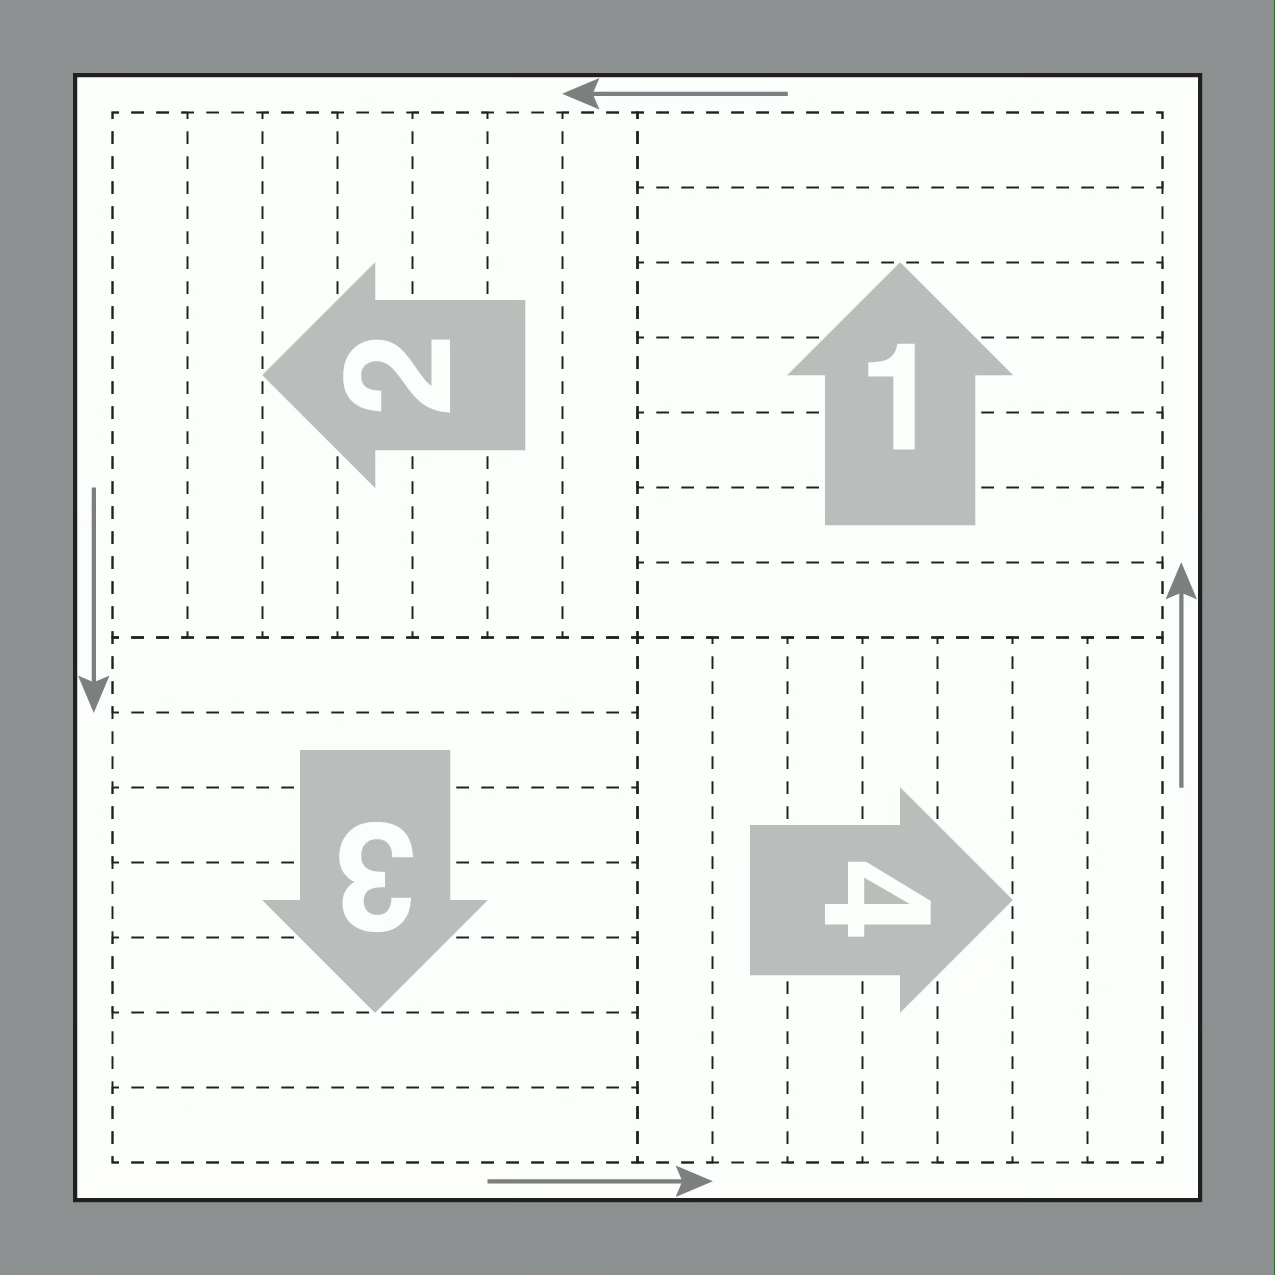
Here is our roadmap. The gray numbered arrows show you the order and direction in which each square is knit. The long skinny arrows around the edges indicate the direction in which the border is knit.
My gauge is 18 sts and 36 rows (18 ridges) = 4". Each of the squares is 70 stitches wide and 140 rows (70 ridges) tall, or about 15½" square. The border will be 5 stitches wide, so the finished blanket will be about 33" square.
Because I wanted 7 stripes of equal width, my stitch count needed to be a multiple of 7 stitches. You could, of course, use this plan with any number of stripes, or no stripes at all. It would be fun to knit this in a yarn with long, gradual color changes, or to use up a lot of leftovers for a scrappy version. Just keep in mind that to make a square, you’ll be knitting twice as many rows as you have stitches on your needle.
Square 1 begins with a provisional cast-on using waste yarn (I used some smooth cotton). My favorite is the crochet provisional cast-on, which involves crocheting a chain around the knitting needle. Purl Soho calls it the One-Step Method, and you can find both photo and video tutorials here. After knitting 140 rows, the stitches from Square 1 are put on hold.
Square 2 begins by picking up and knitting stitches along the side of Square 1. That pick-up row is also the first of the 140 rows in the square. When those rows are complete, the stitches from Square 2 are put on hold.
Square 3 begins by picking up and knitting stitches along the side of Square 2, working until there are 140 rows, then putting those stitches on hold.
Which Brings Us To…
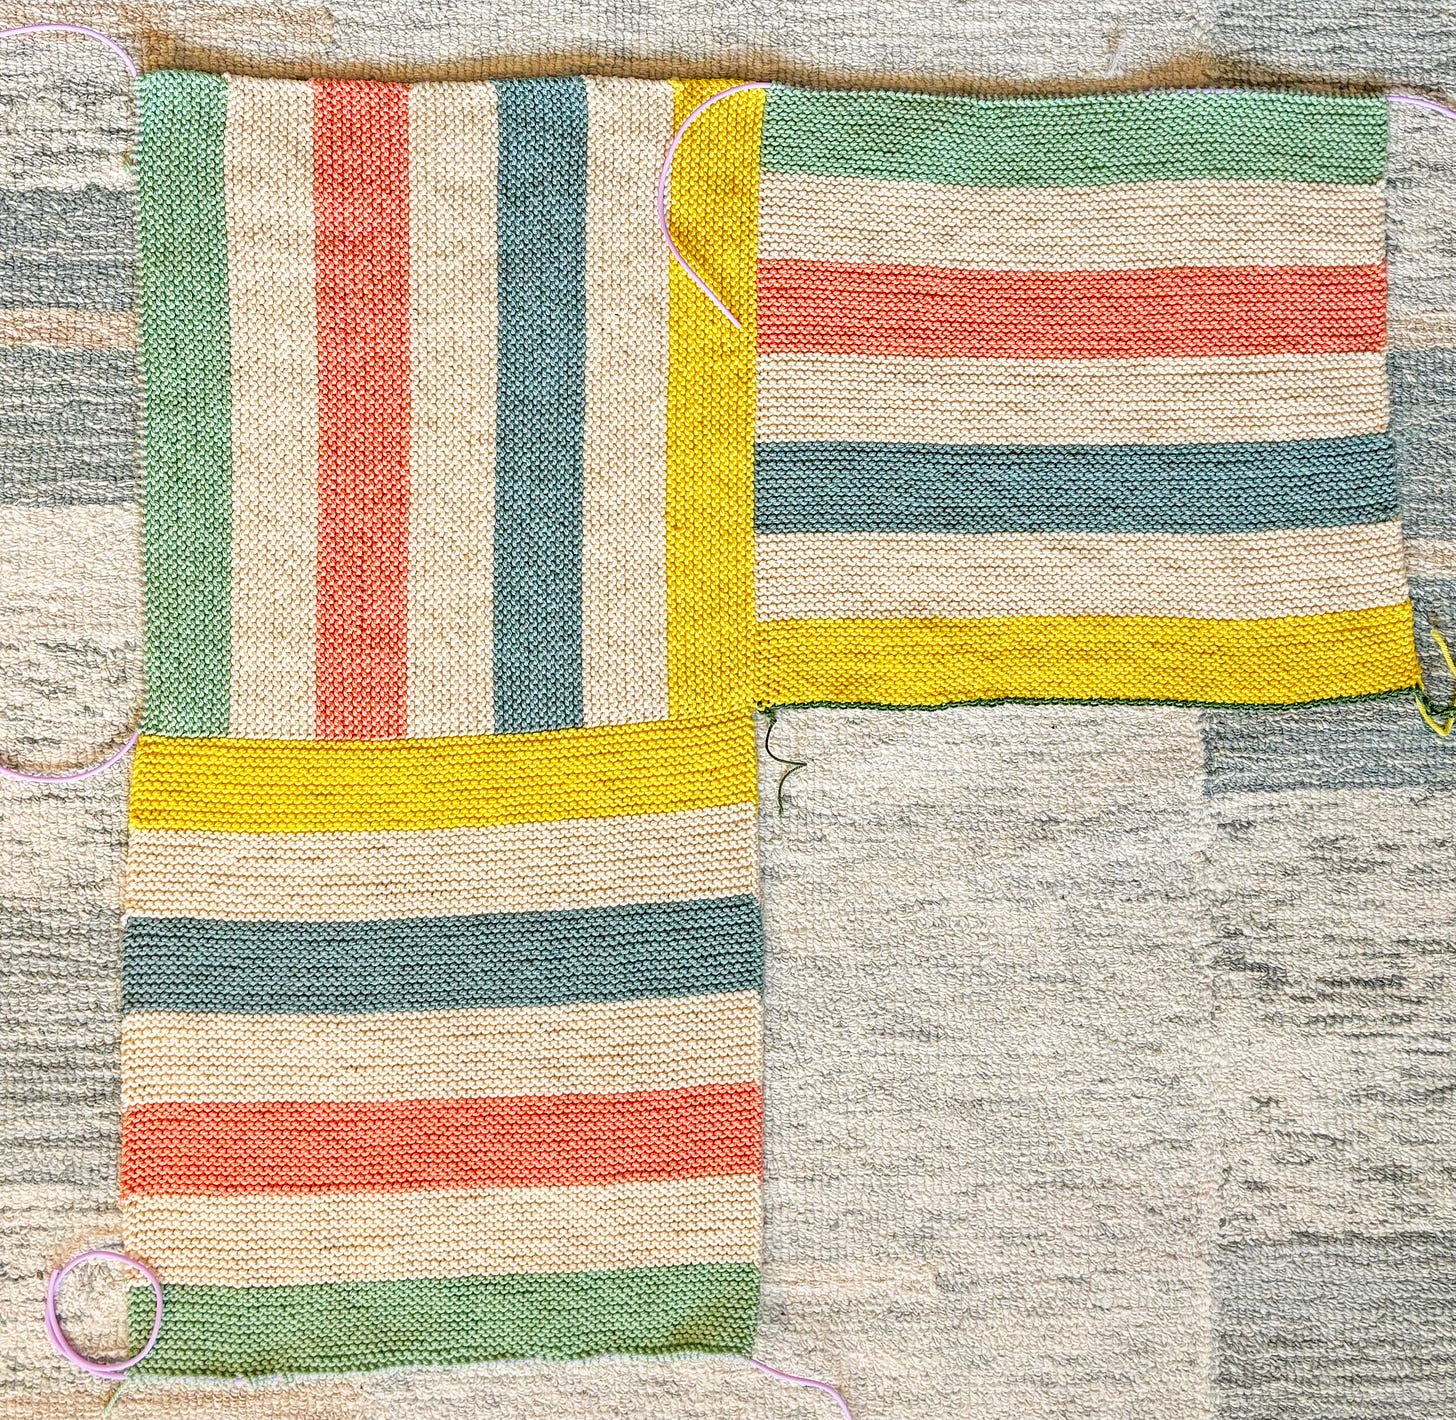
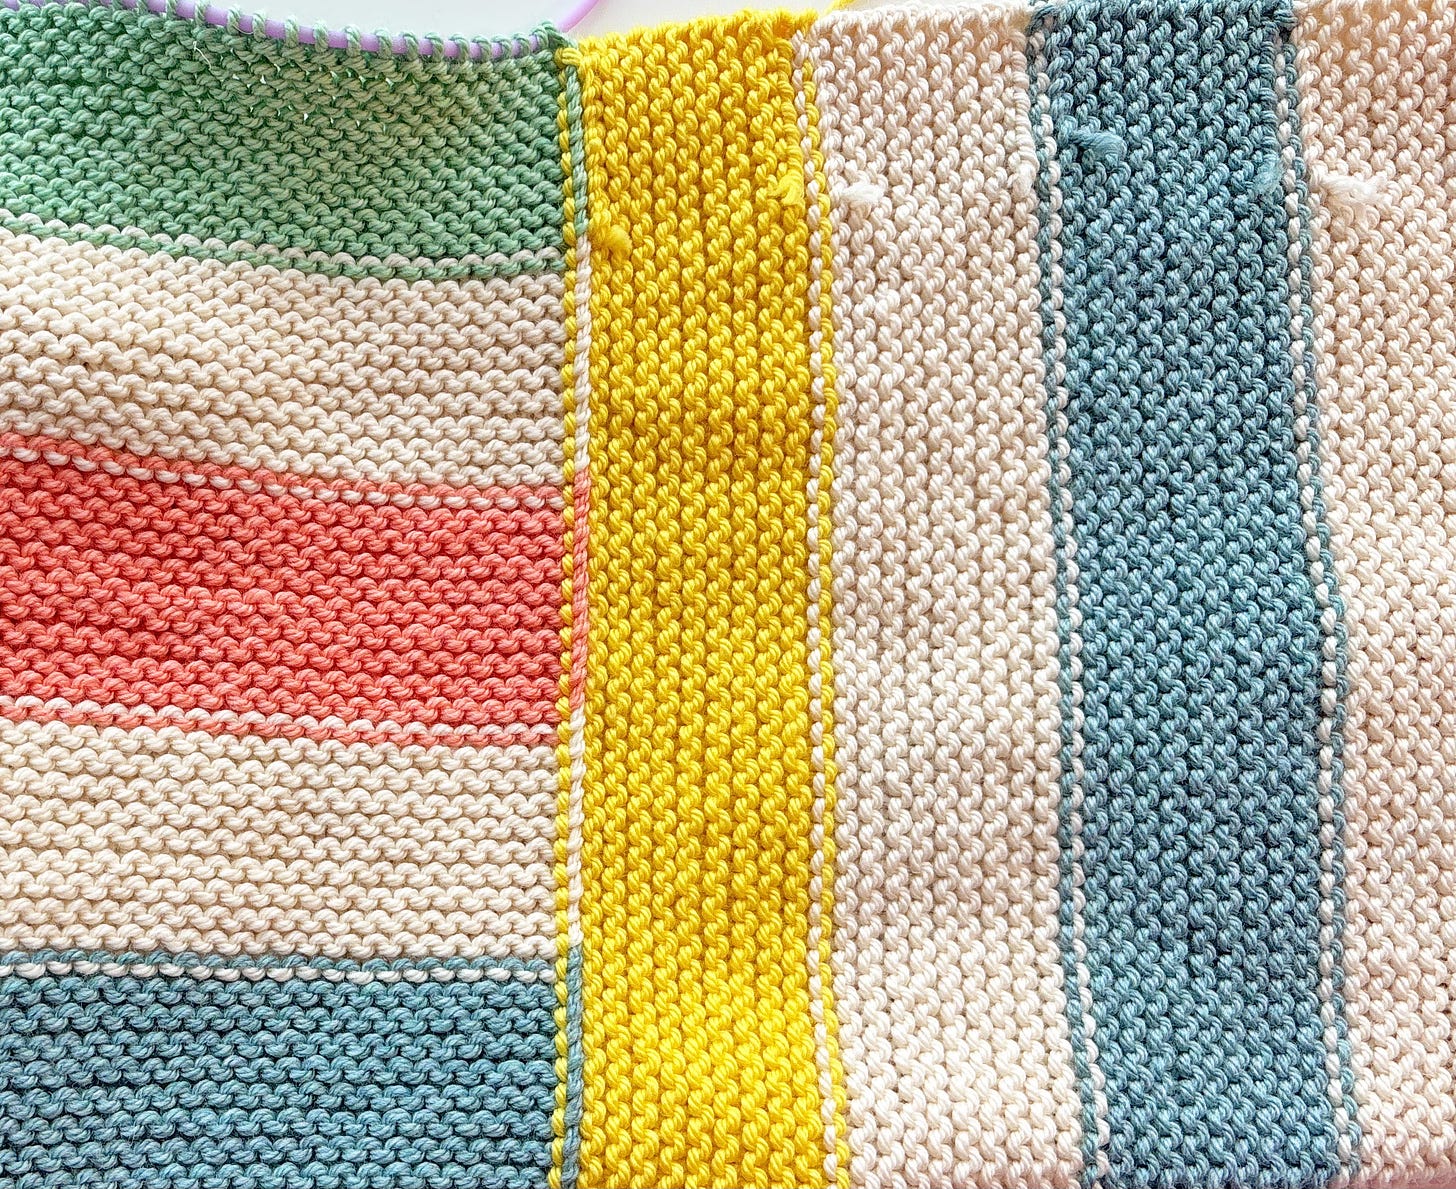
Three squares are complete. You can see the dark green waste yarn used for the provisional cast-on for Square 1. The lavender coils and squiggles at the corners are the silicone tubing I use for stitch holders, which I talked about in detail several months ago. I’m ready to pick up the stitches for Square 4.
Precision and consistency when picking up stitches is key to making the wrong side of this blanket tidy.
As you can see, this blanket will have a definite right side and wrong side, but the wrong side is very neat. I stop to weave in my tails when I’m three or four ridges past the color change. I find few things quite as dispiriting as spending half a Saturday weaving in more than a hundred ends after the knitting is done. I’ll trim those tails after the blanket is washed.
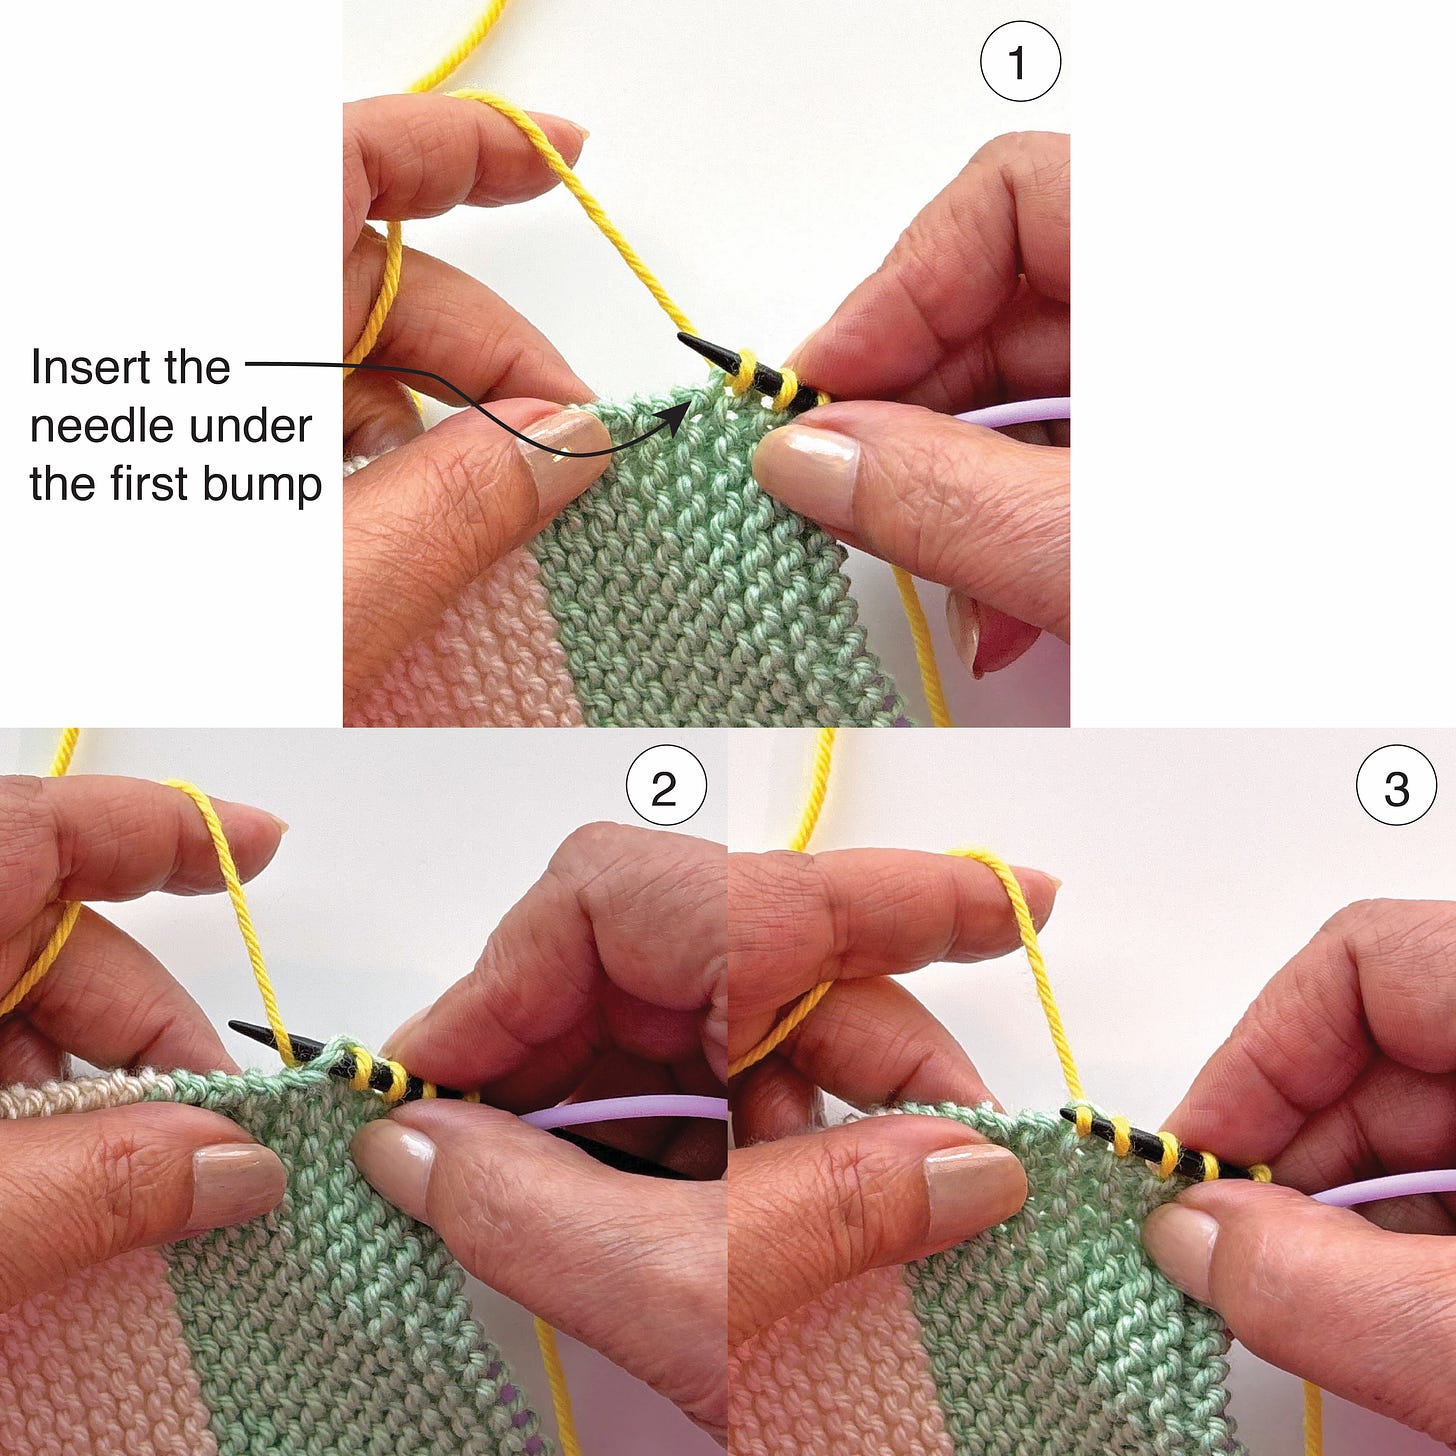
Here is how I pick up and knit along the side of garter stitch to achieve such a tidy join:
Pick up one stitch for every garter stitch ridge. Insert your needle in the very same spot for each ridge. To keep the join snug, you want to pick up under two strands of yarn, not just one. Those strands will form a neat “rope” along the wrong side that is not at all bulky.
Credit Where Credit is Due
This construction method is adapted from information in Barbara G. Walker’s A Fourth Treasury of Knitting Patterns (Schoolhouse Press, 2000). An early chapter of this book describes Walker’s concept of Parquet Squares, where squares of garter stitch are joined together in different directions without seams.
As always, thank you for joining me in this moment of knitting geekery. I hope you find it helpful. In two weeks, I’ll describe how I join Square 4 to that provisional cast-on edge of Square 1. But next week, I have a new yarn review for you!
In the meantime, continue the conversation! What ideas for blanket making are swirling in your head? (This is the perfect time of year to have a big blanket project warming your lap!) How would you use or modify this construction plan to make a no-tight-edges blanket? Tell me about it in the comments.




Excellent
Thank you for this great description of the construction of this fancy garter blanket.
I’m currently binding off a MKAL designed by Kristin in Stitches and inspired by Taylor Swift’s Eras Tour. Instead of picking up and knitting a garter border as suggested, I picked up 200 stitches on one side and knit a stockinette hem. I am right now deciding to either stitch the folded hem loosely or crochet it to the back. Hoping for a not tight edge.
It’s a fluffy cotton yarn- Cumulus.